1.先刷armbian
这里推荐的版本是bullseye_edge
刷好后,连接网线重新开机,进路由找到自己onecloud的ip后,用ssh软件连接
默认账户和密码root/1234
2.终端命令armbian-config修改主机名,固定静态ip地址,重设时区...
3.修改软件更新源地址
终端命令执行:
sed -i.bak 's#http://apt.armbian.com#https://mirrors.tuna.tsinghua.edu.cn/armbian#g' /etc/apt/sources.list.d/armbian.list
编辑 /etc/apt/sources.list
deb https://mirrors.tuna.tsinghua.edu.cn/debian/ bullseye main contrib non-free
# deb-src https://mirrors.tuna.tsinghua.edu.cn/debian/ bullseye main contrib non-free
deb https://mirrors.tuna.tsinghua.edu.cn/debian/ bullseye-updates main contrib non-free
# deb-src https://mirrors.tuna.tsinghua.edu.cn/debian/ bullseye-updates main contrib non-free
deb https://mirrors.tuna.tsinghua.edu.cn/debian/ bullseye-backports main contrib non-free
# deb-src https://mirrors.tuna.tsinghua.edu.cn/debian/ bullseye-backports main contrib non-free
deb https://mirrors.tuna.tsinghua.edu.cn/debian-security bullseye-security main contrib non-free
# deb-src https://mirrors.tuna.tsinghua.edu.cn/debian-security bullseye-security main contrib non-free
# deb https://security.debian.org/debian-security bullseye-security main contrib non-free
# # deb-src https://security.debian.org/debian-security bullseye-security main contrib non-free
以上源来源地址:
https://mirrors.tuna.tsinghua.edu.cn/help/armbian/
4.执行更新
apt update && apt upgrade -y
5.安装ntfs和exfat支持
apt install exfat-fuse ntfs-3g
6.开机挂载磁盘
这里我挂载的是SD卡,稳定性和速度都比USB强,写入测试有40+M/S
查看各磁盘uuid:blkid
新建需要挂载到的文件夹:
mkdir /mnt/mmcblk0p1
修改/etc/fstab文件,在最后一行添加自己的磁盘,添加完成后最好是留最后一行空行
实例:
UUID=c918b0fe-cff5-bd44-a112-f57499d5caf2 /mnt/mmcblk0p1 ext4 defaults 0 2
UUID=EA382B55382B2055 /mnt/mmcblk0p1 ntfs-3g defaults 0 2
UUID=B804-9CBF /mnt/mmcblk0p1 exfat defaults,nofail,umask=0000 0 0
使挂载生效:mount -a
创建一些软连接避免内置空间爆盘
mkdir /mnt/mmcblk0p1/docker
ln -s /mnt/mmcblk0p1/docker /var/lib/docker
mkdir /mnt/mmcblk0p1/DATA
ln -s /mnt/mmcblk0p1/DATA /DATA
mkdir /mnt/mmcblk0p1/w
ln -s /mnt/mmcblk0p1/w /w
mkdir /mnt/mmcblk0p1/www
ln -s /mnt/mmcblk0p1/www /www
mkdir /mnt/mmcblk0p1/opt
ln -s /mnt/mmcblk0p1/opt /opt
mkdir /mnt/mmcblk0p1/containerd
ln -s /mnt/mmcblk0p1/containerd /var/lib/containerd
磁盘挂载相关常用命令:
df -h或者lsblk
查看挂载情况
fdisk -l
查看所有的磁盘信息
mkfs -t ext4 /dev/sda1
格式化磁盘为ext4格式
blkid
查看磁盘uuid
mkdir /mnt/usb1
新建一个usb1文件夹
mount -t ext4 /dev/sda1 /mnt/usb1
挂载/dev/sda1磁盘到/mnt/usb1
umount /dev/sda1
卸载/dev/sda1
7.安装docker
bash <(curl -sSL https://linuxmirrors.cn/docker.sh)
卸载 docker
sudo apt-get purge docker-ce docker-ce-cli containerd.io
sudo rm -rf /var/lib/docker
sudo rm -rf /var/lib/containerd
8.安装1panel
离线安装
上传1panel_1.10.8.sh和1panel-v1.10.8-lts-linux-armv7.tar.gz到/root 目录
终端执行安装
/bin/bash 1panel_1.10.8.sh
或者使用官方安装方式就不用上传文件后本地安装
curl -sSL https://resource.fit2cloud.com/1panel/package/quick_start.sh -o quick_start.sh && bash quick_start.sh
[1Panel Log]: =================感谢您的耐心等待,安装已经完成==================
[1Panel Log]:
[1Panel Log]: 请用浏览器访问面板:
[1Panel Log]: 外网地址: http://14.212.100.118:42235/879475c61c
[1Panel Log]: 内网地址: http://192.168.1.4:42235/879475c61c
[1Panel Log]: 面板用户: a72b557d69
[1Panel Log]: 面板密码: 96b9cf982b
[1Panel Log]:
[1Panel Log]: 项目官网: https://1panel.cn
[1Panel Log]: 项目文档: https://1panel.cn/docs
[1Panel Log]: 代码仓库: https://github.com/1Panel-dev/1Panel
[1Panel Log]:
[1Panel Log]: 如果使用的是云服务器,请至安全组开放 42235 端口
[1Panel Log]:
[1Panel Log]: ================================================================
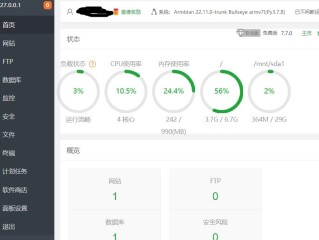
安装完成后进入到1panel后台
【面板设置--备份账号】 查看你的备份目录。
我这里一般默认是/opt/1panel/backup
【主机--文件】
/opt/1panel/backup
新建一个文件夹system_snapshot
把1panel_v1.10.9-lts_armv7_20240525135008.tar.gz上传到system_snapshot。
【面板设置--快照】,同步快照,选择服务器磁盘,选中这个包进行恢复。
恢复后是进不了web后台的
使用 1pctl user-info 来查看1Panel管理面板的端口、安全入口、账号与密码
使用1pctl update --help 查看所有1pctl指令
修改面板信息
修改面板密码 1panel update password
修改面板端口 1panel update port
修改面板用户 1panel update username
status 查看 1Panel 服务运行状态
start 启动 1Panel 服务
stop 停止 1Panel 服务
restart 重启 1Panel 服务
uninstall 卸载 1Panel 服务
user-info 获取 1Panel 用户信息
listen-ip 切换 1Panel 监听 IP
version 查看 1Panel 版本信息
update 修改 1Panel 系统信息
reset 重置 1Panel 系统信息
restore 恢复 1Panel 服务及数据
用新修改的后台地址账号密码登录
进入web后台后,重建应用即可
9.安装web环境
(带环境的恢复包不用安装)
由于玩客云芯片是32位的armv7l很多最新的包是无法使用的。
下载 armv7l 架构最新版本镜像
docker pull biarms/mysql:5.7.33-beta-circleci
先查看应用商店中使用的 MySQL 版本,然后将镜像重命名为 1Panel 应用商店中使用的 MySQL 版本
docker tag biarms/mysql:5.7.33-beta-circleci mysql:5.7.44
在应用商店中安装 MySQL
下载 armv7l 架构最新版本镜像
docker pull imzcc/openresty:1.21.4.1-7-alpine
先查看应用商店中使用的 OpenResty 版本,然后将镜像重命名为 1Panel 应用商店中使用的 OpenResty 版本
docker tag imzcc/openresty:1.21.4.1-7-alpine 1panel/openresty:1.21.4.3-2-2-focal
在应用商店中安装 OpenResty
在应用商店中安装 php7
10.下面是你可能需要的docker(1panel应用中心没有或者不适配armv7)
emby破解版
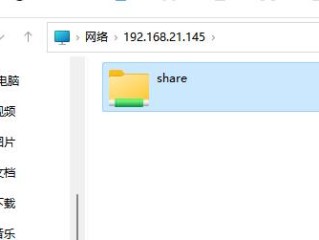
docker run -dit -v /mnt/mmcblk0p1/share:/data -p 8096:8096 --name emby --hostname onecloud --restart unless-stopped shiyu1314/embyserver-crack_arm32v7:latest
aria2-pro修改版
docker run -d --name aria2-pro --restart unless-stopped --log-opt max-size=1m -e PUID=$UID -e PGID=$GID -e UMASK_SET=022 -e RPC_SECRET=105267 -e RPC_PORT=6800 -p 6800:6800 -e LISTEN_PORT=6888 -p 6888:6888 -p 6880:6880 -p 6888:6888/udp -v $PWD/aria2-config:/config -v /mnt/mmcblk0p1/share/downloads:/downloads shiyu1314/aria2-pro:latest
禁用aria2令牌
sed -i 's/rpc-secret=105267/#rpc-secret=105267/g' aria2-config/aria2.conf
全平台架构qbittorrent
docker create --name=qbittorrentee -e WEBUIPORT=8080 -e PUID=1026 -e PGID=100 -e TZ=Asia/Shanghai -p 6881:6881 -p 6881:6881/udp -p 8080:8080 -v /opt/qbittorrentee/config:/config -v /mnt/mmcblk0p1/share/downloads --restart unless-stopped superng6/qbittorrentee:latest
WebUI:http://localhost:8080
WebUI 管理员用户名是:admin
前往终端日志得到临时密码:EEjWhu2Cs
在程序首选项中设置你自己的webui密码

教程资源下载链接:
https://x.bangshun.com/alist/share/%E6%90%9E%E6%9C%BA%E4%B8%AD%E5%BF%83/%E7%8E%A9%E5%AE%A2%E4%BA%91